Socratic Seminar for the Covid Classroom

Socratic Seminar for the Covid Classroom

As teachers struggle to navigate the new landscape of the Covid classroom, I’m reminded of a Socratic seminar model I used years ago while teaching AP history and government. It blended instruction in both full class and smaller seminars in way that could be a useful model to decrease the density of today’s classroom.

What drove my seminar model was PBL approach with weekly research tasks – though I had yet to hear the term “project-based learning.” My experience using this approach back in the 1980-90’s convinced me that advanced placement can be much more productive than the traditional AP model of lecture, read, memorize and test.

While this seminar approach produced great results on AP exams, its prime outcome was fostering students’ responsibility for themselves as learners. Covid-19 is upending our traditional classroom models. Instead of simply trying to find news ways to deliver the same stuff, we should leverage this disruption to refocus teaching and learning in ways that engage and motivate both students and teachers.


The Socratic Seminar Model

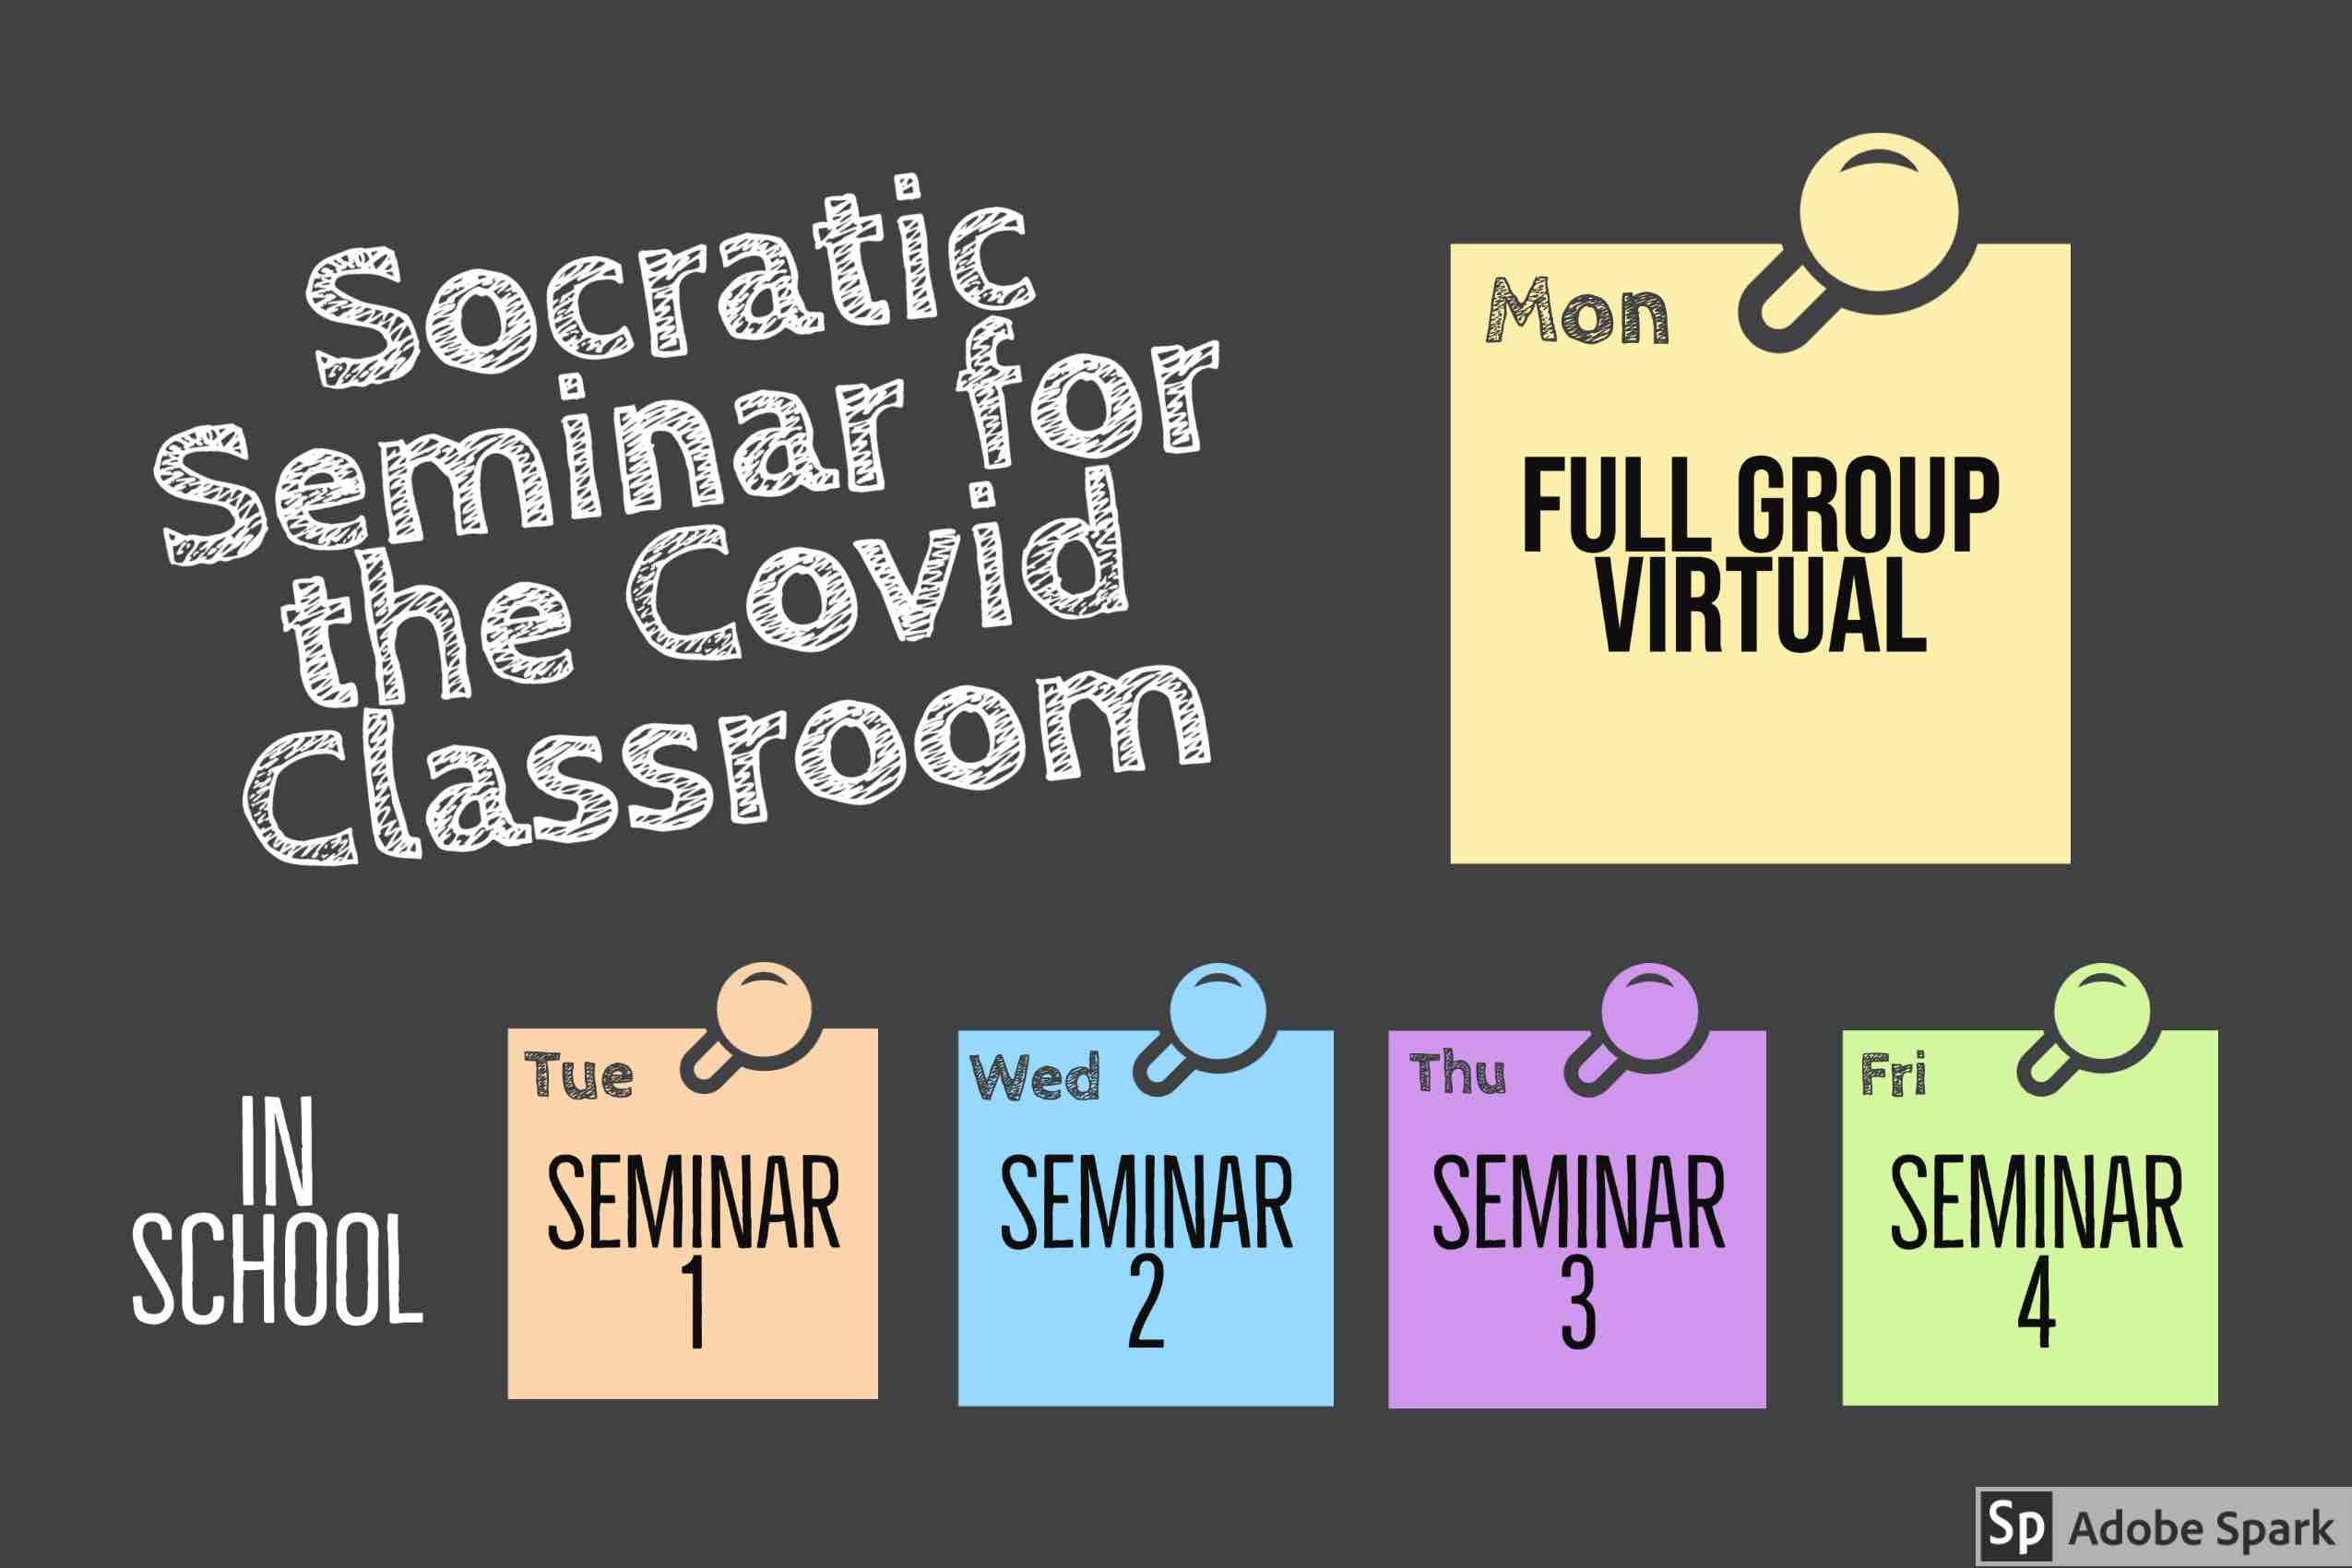
As we look for ways to blend virtual learning and meet live in smaller classes – this model could be modified by substituting an online session for the full class large group. Seminar size and frequency are adaptable to the setting.

Class size typically ran between 24 – 36 students. All students in the class would meet one day a week in a large group session. This might be used for unit testing, or to introduce or conclude a seminar cycle with a lecture or full group discussion. The large group was also divided into 4 seminar groups of 6-9 students. Each seminar would meet with me one day per week. Thus each student met one day per week in seminar and another day in large group. During the remainder of their week, students worked independently or with their seminar group in preparation for the upcoming assignment. Today, we would call that “flipping the classroom.”

Seminar assignments built off the large group session and were project driven. Students in the seminar were required to present and defend their finding to their peers. I sat “outside the circle” as an observer – occasionally tossing probing questions into the group.

Of course, there were many weeks that were modified because of holidays and other interruptions – but you get the idea. Our high school was on traditional 8 period schedule. These AP classes were taught in a double period configuration of about 95 minutes for both the seminar classes or large group sessions.

My first experience was teaching one semester of AP US History while one of my colleagues was on leave. I focused on essential questions that fostered greater depth and relevance. So when we studied the Founding Fathers we didn’t focus on “Should the Constitution be ratified?” Our seminar revolved around a more enduring question – “How powerful should the national government be?” For more on that approach, see my post “Essential Questions in American History: The Great Debates.” 

After my semester of APUSH, I settled into my primary AP assignment – one semester of AP American Government / Politics and one semester of AP Comparative Government. There I used the seminar approach to give students guided experience in research, critical thinking, collaboration and presentation. 


Visualize the typical American government lesson. Teacher standing up front asking students to follow along as they go over the diagram of “how a bill becomes a law.”

Contrast that with one of my AP US Government seminars on the same topic.

Congress and the Lobbyists
This extended seminar will investigate the relationships between Congress and the lobbyists. You will develop an investigative report which will ultimately answer the question “Does Congress represent the needs of its public constituency (the electorate) or its financial constituency (its contributors)? Weekly seminar abstracts will be used to prepare Tabloid TV-style PowerPoint report in support of your investigation. To see the full seminar assignment click here.  

Students were assigned a member of Congress who sat on one of the major committees. Their task over the next few weeks included researching and developing the following:

  • Demographic / political profile of their legislator’s elective constituency.
  • Profile of their financial contributors.
  • Committee jurisdiction and major lobbyists.
  • Voting record on legislation of interest to their elective constituency and financial contributors.
  • Their answer to the seminar question with supportive reasoning.  
  • Presentation and reflection

Teachers: Find the Courage to Be Less Helpful

I just finished teaching my undergraduate edtech methods class at University of Portland. I had a dozen students  – sophomores through seniors. Most had limited tech backgrounds.

Rather than teaching apps, I taught adaptability. That began with having the courage to be less helpful. At our first class I gave them a simple assignment – create “Tech-Savvy Teacher’s Meme” using Adobe Spark Post and then write a blog post elaborating on your meme in our WordPress site. No one in the class had used either Adobe Spark nor WordPress. No direct instruction from me – I had a created some YouTube video explainers. They had to figure it out themselves. The result – everyone was able to make a cool meme and write their first post on WordPress. They didn’t simply learn a few apps – they learned “I can do this!”

Over the next 14 weeks, we progressed PBL-style through a variety of skills and perspectives. Each class added new tools and perspectives to prior experience – curating public domain content, screencasting, digital storytelling, video production. By the time we got to the end of the course, I had them testing and critiquing apps with no support from me. I would give them three apps designed to perform similar tasks, ask them to work in teams to figure out how to use them, report back to class the pros and cons. And then everyone in the class would choose one app for completing the next assignment – For example – turn a video into a lesson using EdPuzzle, Video Ant, or TEDed.

As a final assignment I asked them to create a demonstration of their favorite app as a chapter in our collaborative iBook – Tech Tips for Teachers. Available free at iTunes or as a static pdf download. (14 mb)

So how did it go – here’s some comments from their final reflections

Laura: I learned that I really need to push myself when it comes to trying new things, because I am capable of much more than I give myself credit for. …  a lot of these new tools intimidated me and I was afraid to try them, but once I did, I found it pretty easy to use.

Margaret: I’ve really enjoyed my time in this class this semester. It was definitely one to look forward to in the week, a break from the typical lecture style of other classes. Something I learned about myself during this class is that despite not liking the amount of freedom given to me, I have found ways to create guidelines for myself. … I think with all the things that I have learned during this short amount of time, and the simple pride I got from figuring out how a piece of tech works on my own – I think I will be able to “keep up with the times” with relative ease.

Kiana: Prior to this class I was, admittedly,  worried and mildly fearful about utilizing technology so frequently in the classroom. I had very limited knowledge and experience with these types of tools and felt that I would be unable to create products worth sharing with the online world. Although my posts this semester may not be TPT (Teacher Pay Teacher) ready, I was pleasantly surprised with how much content I have created in such a short period of time…. I have already begun to share my knowledge of these “tech tools” with family and friends who are also impressed with how many accessible (free), resources there are.

Dylan: Unlike most classes that follow a specific rubric or have step-by-step instructions, this class and Prof. Pappas, gave us an incredible opportunity to explore new technology, but figure out all the tips and tricks on our own. .. one of the most exciting parts of this class were all the ideas I generated when thinking about what tech tools I now have in my toolbox and ones which I can easily use in lesson and unit plans, as well as on a daily basis with my students. I hope to encourage my students to use technology wisely and to most importantly…be creative with it!v

Nick: Our instructor gave us students just enough background information so that we could wrestle with discovering the technology ourselves. ..He pushed us students to learn for ourselves as he gently guided us alongside. I felt this was a perfect approach to teaching this class as I now feel more prepared to be adaptable and curious to continue learning.

Jordyn: There were also times where I would be using a new app and I just had to figure it out through trial and error. Once I had worked through it for a little while I felt very comfortable using it. Being willing to fail is one of the only ways that we truly learn anything in my opinion.

Melissa: Looking back on that first day of ed tech methods, I felt I was afraid to take that risk and get outside of my comfort zone. I  was an advocate for technology, but only ones that were safe,  such as SmartBoards or Elmos which are simply advanced versions of projectors and white boards. … While there were many programs I was nervous to use,  I was also able to learn new tools which I found my new strengths in.

Bri: I never particularly saw myself as a “tech person” and was a little fearful of whether I would be able to navigate my way around all this new technology. … I am proud of the amount of work I have produced in the short amount of time we have had together and I am proud to say I am not so fearful of exploring new technology that comes my way and I could also potentially see myself implementing these technology tools into my own classroom in the future.

Madison: I learned that stretching myself to learn different things is important in order to become more confident. I learned that although technology is a difficult subject for me, it is good for me to learn new things in order to grow as a person. I am definitely on my way to becoming a “tech-savvy” teacher!

Michael: Overall, it is my opinion that this course was a great success. One of the foundations listed on the class’s website states that the course “leverages a project/problem-based approach,” while another one says that it “…develops critical evaluation skills for assessing what works.” These were both met spectacularly: the course ran using an effective weekly project-based approach that promoted individual critical thinking concerning a wide variety of useful – and sometimes not useful – educational technologies for classroom use.

Lauren: I also learned a few things about myself as a learner too. I learned that I about how much fun teaching can be. All these tech tools take a lot of creativity and flexibility and these were both aspects of myself I needed to work on. Using the Apps we learned about caused me to challenge myself as a more hands on student and future teacher.

Hanna: I saw myself doing things with technology that I had never done before and pushing myself to try new things. I learned that technology is a lot more fun to include in every aspect of the classroom when you are comfortable with it!

PBL with Digital Storytelling Tools

PBL with digital storytelling tools

This past semester my social studies methods class at the University of Portland partnered with the Oregon Jewish Museum and Center for Holocaust Education (OJMCHE) to design curriculum for the Oregon Holocaust Memorial in Washington Park here in Portland Ore. With historical memorials in the news and neo-Nazis on the march, this community-based challenge inspired my students to use a PBL approach to explore instructional design with purpose.

We explored the Holocaust Memorial and the Oregon Jewish Museum reflecting on how we could provide contextual information to enhance the visitor experience to the Memorial. Working with April Slabosheski, the OJMHE Manager of Museum and Holocaust Education, we envisioned interactive resources that would benefit a busy teacher bringing middle and high school students on a field trip to the Memorial. We knew that the same tools would be useful to any visitor to the memorial.

Oregon Holocaust Memorial Header

We designed a WordPress site – Oregon Holocaust Memorial to host the resources. Students used their class experience using a variety of storytelling tools from KnightLabs to create new content for our Memorial site. Other apps were integrated into the site included: ESRI StoryMap, ThingLink, SlideShare, Apple Keynote, iMovie and Garage Band.


Digital storytelling tools:

Place by Nancy Guidry offers insights into the geography of the holocaust. Nancy used JuxtaposeJS and ArcGIS Story Maps.

Time by James Bayless and Kelly Sutton features a timeline made using TimelineJS.

People by David Grabin and Taran Schwartz details both the millions murdered in the Holocaust and the stories of some of the survivors. It was made using StoryMapJS and Apple Keynote.

Visit by Paxton Deuel orients visitors to the site with an interactives made using ThingLink and Apple Keynote / SlideShare.

I like to collaborate in these projects, so I created a section called Voices. It uses SoundCite to add inline audio oral history clips of survivors talking about family members murdered in the Holocaust.


Paxton Deuel wrote a reflection on the project that captures the power of PBL:

What separates project-based-learning (PBL) from other instructional techniques, is that at the end of the day, after grades, and feedback, and anxiety filled finals week, students (that’s us) are left with a product that extends beyond the classroom. In this case, the product is the Oregon Holocaust Memorial website. But just imagine, if most classes were project driven, how many meaningful and authentic contributions could students produce? The possibilities are endless.

A common complaint of higher education is that it exists in a vacuum. A protected environment insulated from the demands of the real world. Professors and students fill their time with hypothetical musings and idyllic aspirations for the future…. PBL bridges the gap between academia and “real life” by giving students the opportunity to create products that will be used outside of school, outside of the university bubble. This makes the school work both meaningful and productive, qualities that every student should strive for–from pre-schoolers to Ph.D’s.


Image credit: Vintage Typewriter by Florian Klauer / Unsplash

Exploring History Vol V: Six Document Based Lessons

Exploring history Vol V

I’m very pleased to share a new multi-touch iBook just published by my Social Studies Methods class at the University of Portland. Exploring History: Vol V was our PBL capstone and is available free at iTunes in 51 countries around the world. It features these World and US History lessons:

  1. WWII Propaganda: Close Reading by Nancy Guidry
  2. The Limits of Leadership by Paxton Deuel
  3. African Imperialism by Kelly Sutton
  4. The Harlem Renaissance by Taran Schwartz
  5. Western Expansion Text Set by James Bayless
  6. An Account of The Red Summer by David Grabin

This book is the fifth in a series of “Exploring History” titles designed by my UP preservice social studies teachers. The books have been very popular – with over 30,000 downloads from nearly two dozen countries. Writing for an authentic and global audience has been one of the prime motivators in this on going publishing project.

Interactive iBook version ~ Free at iTunes
Download Static PDF version (10 MB)

It features six engaging questions and historic documents that empower students to be the historian in the classroom. The units draw from a fascinating collection of text and multimedia content – documents, posters, photographs, audio, video, letter and other ephemera. “Stop-and-think” prompts based on CCSS skills guide students through analysis of the primary and secondary sources. Essential questions foster critical thinking. All documents include links back to the original source material so readers can remix the content into their own curated collections.

All of my student’s wrote for a public audience on our class blog and pursued three class goals:

  • Learn to think like a historian.
  • Become a skillful instructional designer
  • Develop technical skills for production, reflection, growth and professional networking.

The lesson design process began early in the semester when students designed lessons in historical thinking skills based on the work of Sam Wineburg and the Stanford History Education Group (SHEG). They focussed on three key skills – Sourcing, Contextualizing and Corroborating. Then students identified essential questions worth answering and gathered documents to explore the question.

Here’s a post (from fall ’13 class) that describes our project workflow (including how we utilized iBooks Author). The Exploring History includes four additional volume

Students Design Lessons for Holocaust Memorial

Oregon Holocaust Memorial

This fall my social studies methods class at the University of Portland will work with the Oregon Jewish Museum and Center for Holocaust Education (OJMCHE) to design curriculum for the Oregon Holocaust Memorial in Washington Park here in Portland Ore. With historical memorials in the news and neo-Nazis on the march, this community-based challenge will allow my students to use a PBL approach to explore instructional design with purpose. The lessons learned will serve them well in their careers as secondary social studies teachers.

“Why do we build memorials? Why/ what do we need to remember?
~ Nancy Guidry, student.

My students will team with OJMCHE Holocaust Educator, April Slabosheski to create lessons to support middle and high school visits to the Memorial. I invite readers to follow our progress here and at our class blog. We welcome your advice, suggestions and encouragement.

After our first visit to the memorial I invited students to share their reactions:

  • Imagine a primary source account for each of the lost belongings – baby’s shoe, broken violin, abandoned suitcase, baby doll telling the story of a childhood ripped away. ~ James Bayless
  • What is truly amazing is how a carefully architected combination of stone and aluminum can evoke such strong emotions (i.e. sadness, fear, anger, etc.). I didn’t know any of those names engraved upon the dark grey stone wall, but I shared part of their suffering and pain by merely reading their names and imagining their circumstances. It became evident to me that we humans are truly all connected– this connection stretching across time, place, ethnicity and circumstance. Amazing. ~ Paxton Deuel
  • What struck me the most was probably the simplicity of it. No amount of elaboration would do justice to the horror remembered there, so it seemed appropriate, in a way. ~ Taran Schwartz
  • One train of thought that really stuck with me was the idea of reflection. We don’t necessarily always stop and reflect on the buildup of extremely catastrophic events. We tend to merely focus on the event itself. Very excited for this project. ~ Kelly Sutton
  • What an exciting opportunity! Should keep the Oregon survivor central- these are people within our community; how far reaching these events were, how connected we are to history. The town square design was particularly powerful; idea that that was where holocaust really started- othering Jews and people let it happen. Idea that the town square is also a place where future things like this can be prevented- people taking to the streets in solidarity, people gathering to talk across differences. ~ Nancy Guidry

More on the Oregon Holocaust Memorial:

The Oregon Holocaust Memorial was dedicated on August 29, 2004. The memorial features a stone bench adorned with wrought-iron gating, screened from the street by rhododendron bushes. The bench sits behind a circular, cobblestoned area – simulating a town square. During the Holocaust, many Jewish families were gathered in town squares before being loaded onto trains and taken to concentration camps. The square contains scattered bronzes of shoes, glasses, a suitcase, and other items to represent everyday objects that were left behind. A European-style, cobblestone walkway with inlaid granite bars, simulating railroad tracks, leads to a wall of history panels – giant, stone placards that offer a brief history of the Holocaust and quotes from Holocaust survivors. At the end of the wall is the soil vault panel. Buried below the panel are interred soil and ash from six killing-center camps of the Holocaust – Chelmno, Treblinka, Sobibor, Belzec, Majdanek, and Auschwitz-Birkenau. The back of the wall is engraved with the names of people who died in the camps, followed by the names of their surviving relatives in Oregon and SW Washington. Source

Image credits: Peter Pappas